Understand how to set up different availabilities for your meetings
By the end of this tutorial, you’ll know how to create a new availability schedule, set multiple daily time slots, copy hours across days, choose a timezone, and add date-specific overrides for when you’re available or unavailable.
A well-built availability schedule helps you control when people can book time with you without needing to adjust your calendar manually every day. With multiple time slots, copied hours, timezone settings, and date overrides, you can build schedules that match how you actually work.
Before you start: You should already have access to your lemcal workspace and know how to open your scheduling settings.
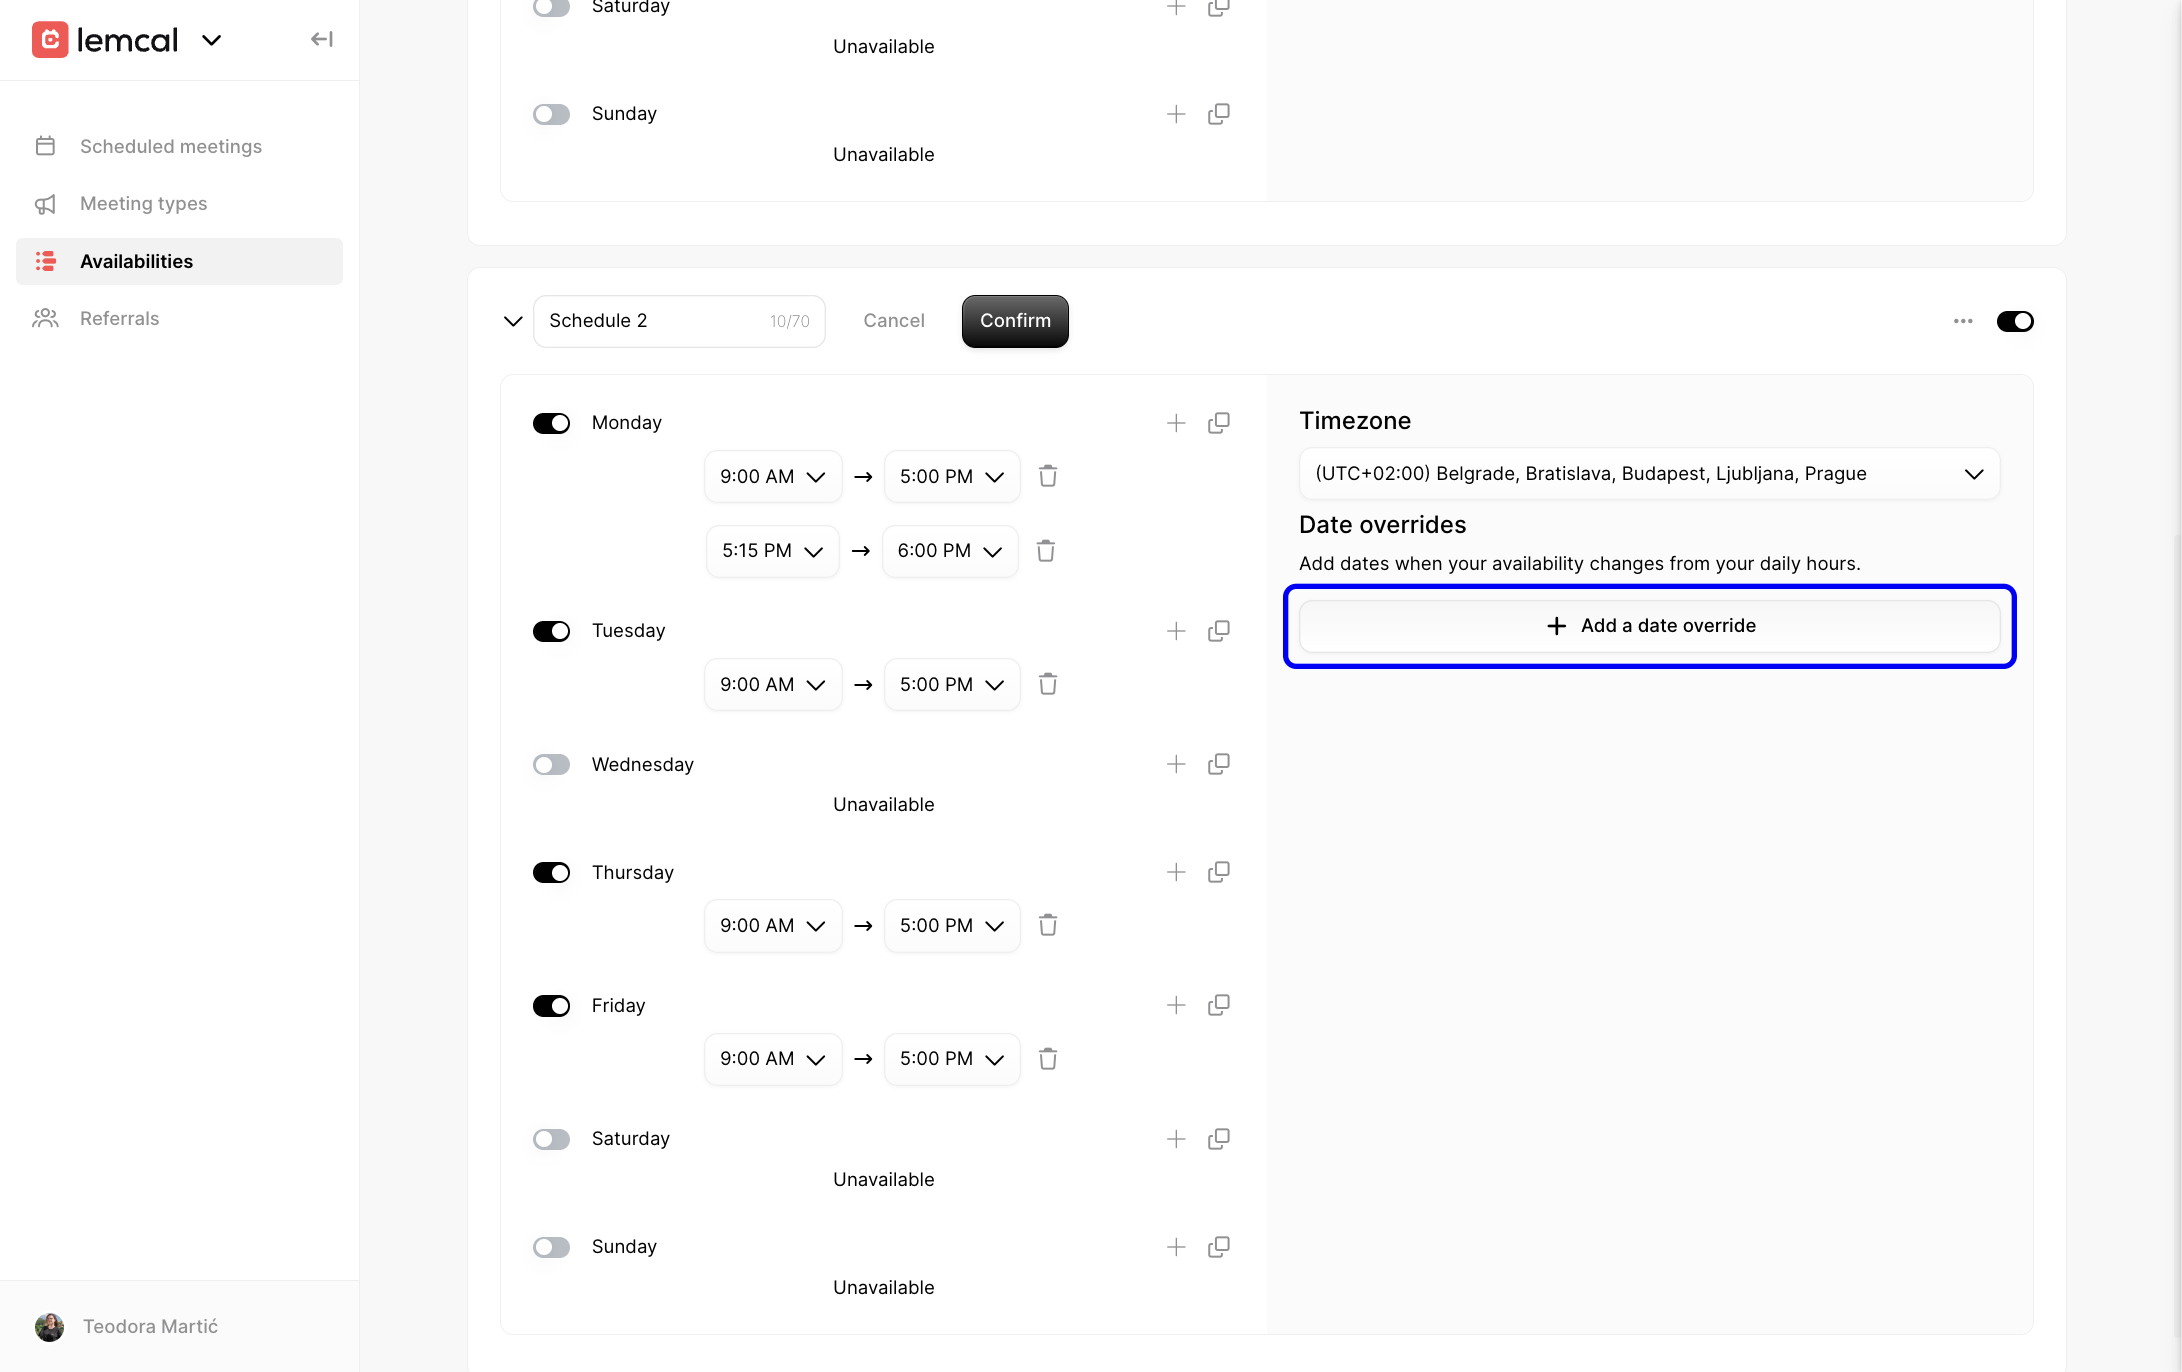
Step 1: Open Availabilities and create a new schedule
Go to Availabilities from the left sidebar, then click New schedule. This creates a fresh schedule you can customize for a specific workflow, team, or meeting type.

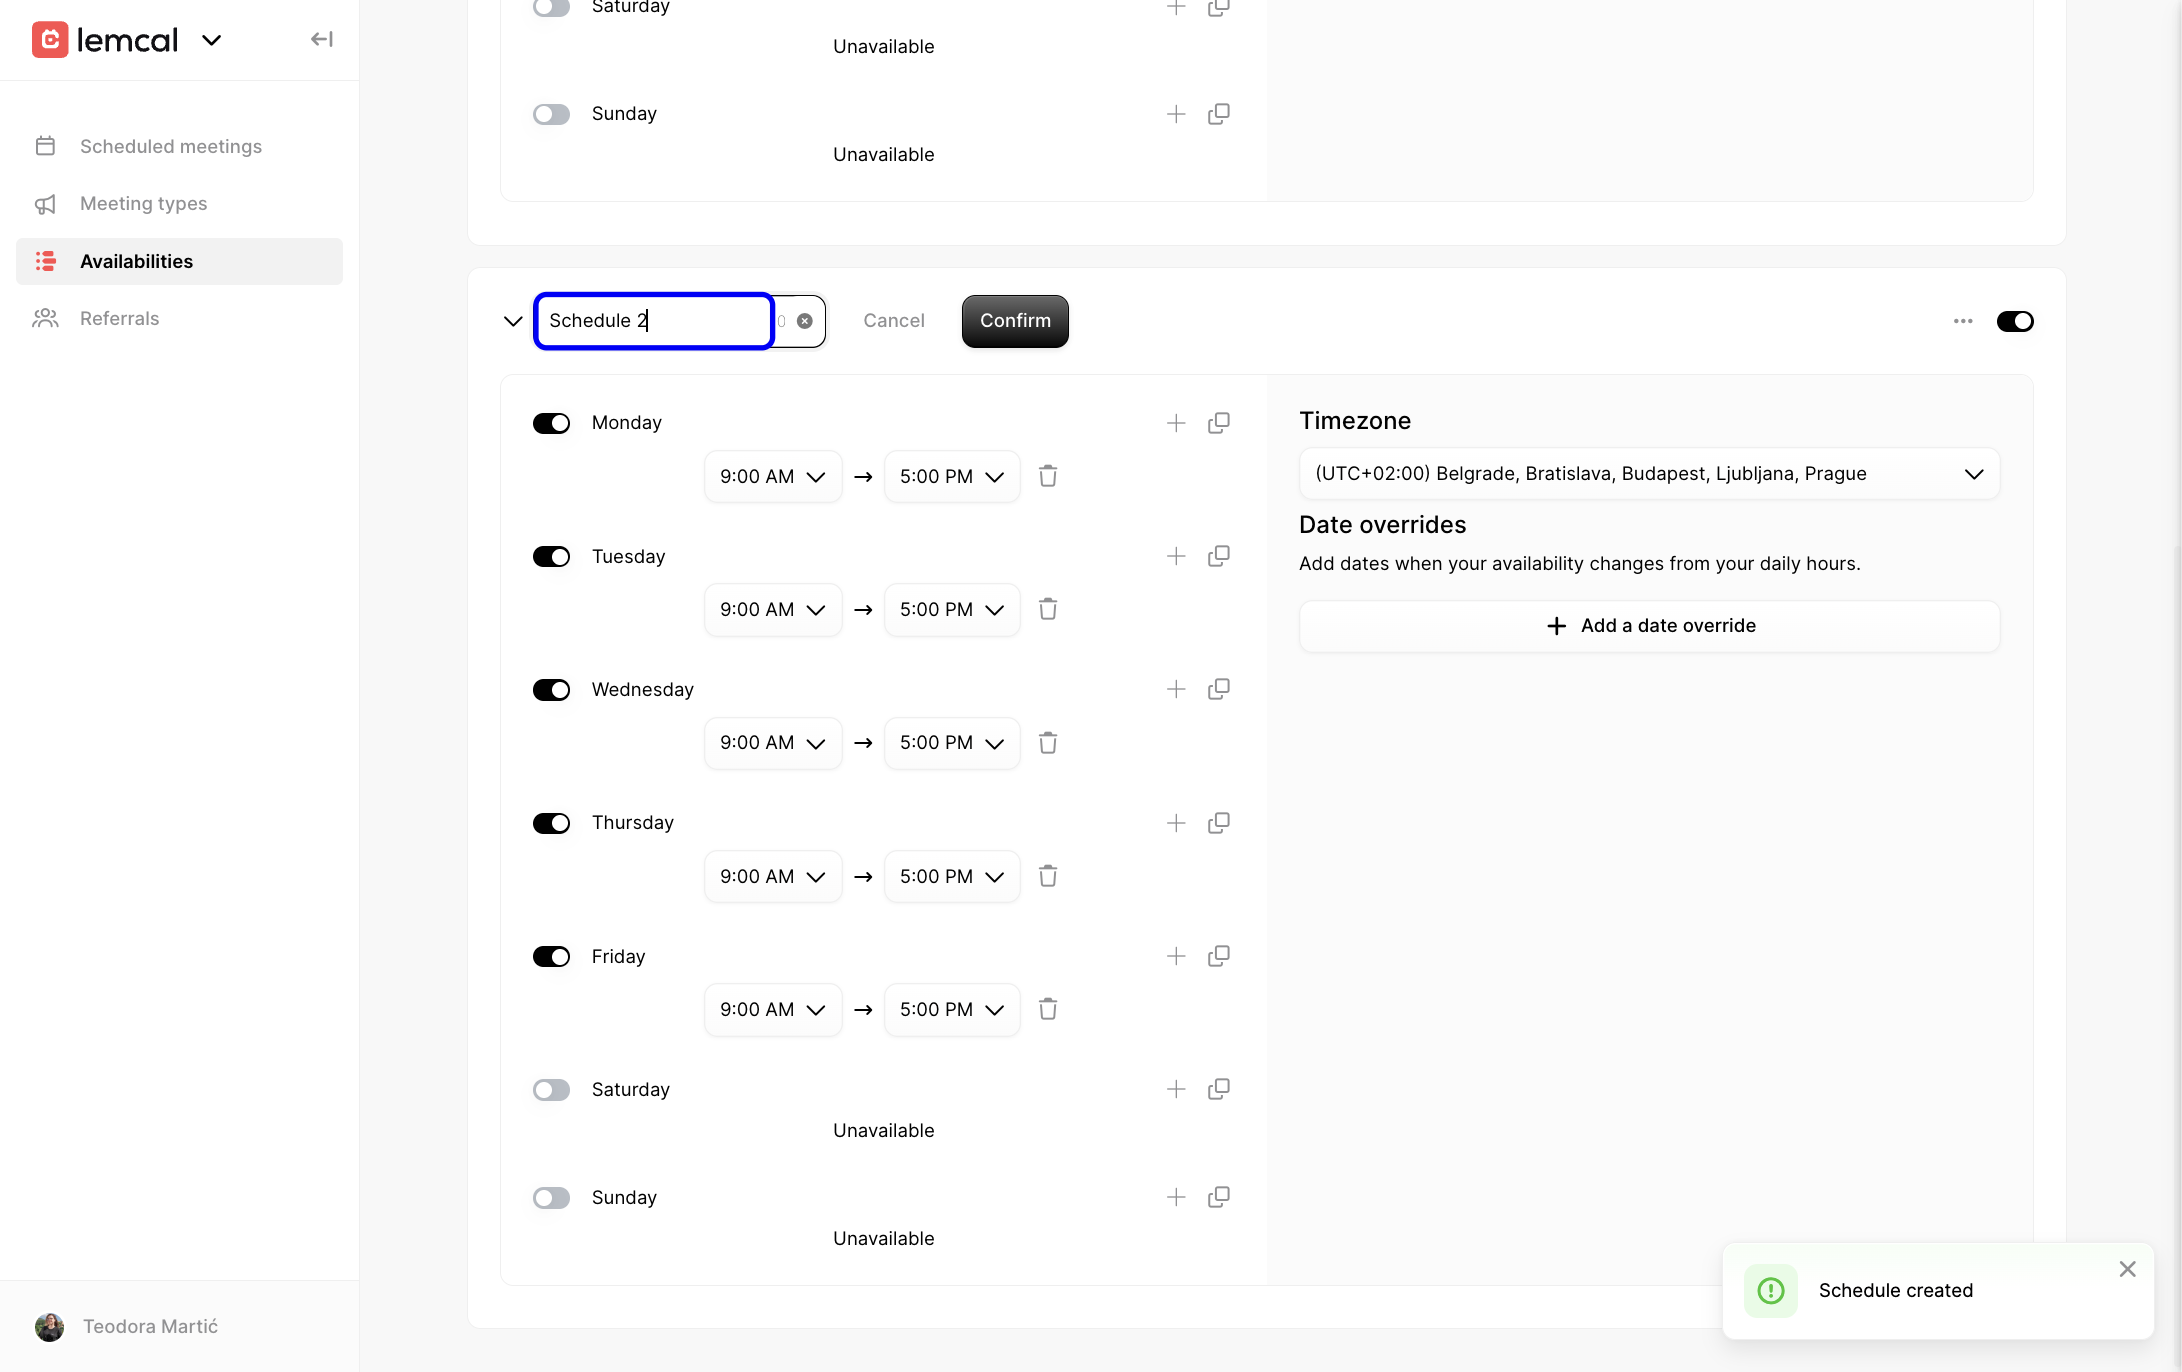
Step 2: Name your schedule and confirm it
Enter the name you want to use for the schedule, then click Confirm. Use a clear name so it’s easy to recognize later, especially if you manage different schedules for different use cases.
Step 3: Define a time slot for a day
For each day you want to be bookable, turn the day on and choose the start and end time. This is your base weekly availability that meeting types can use.

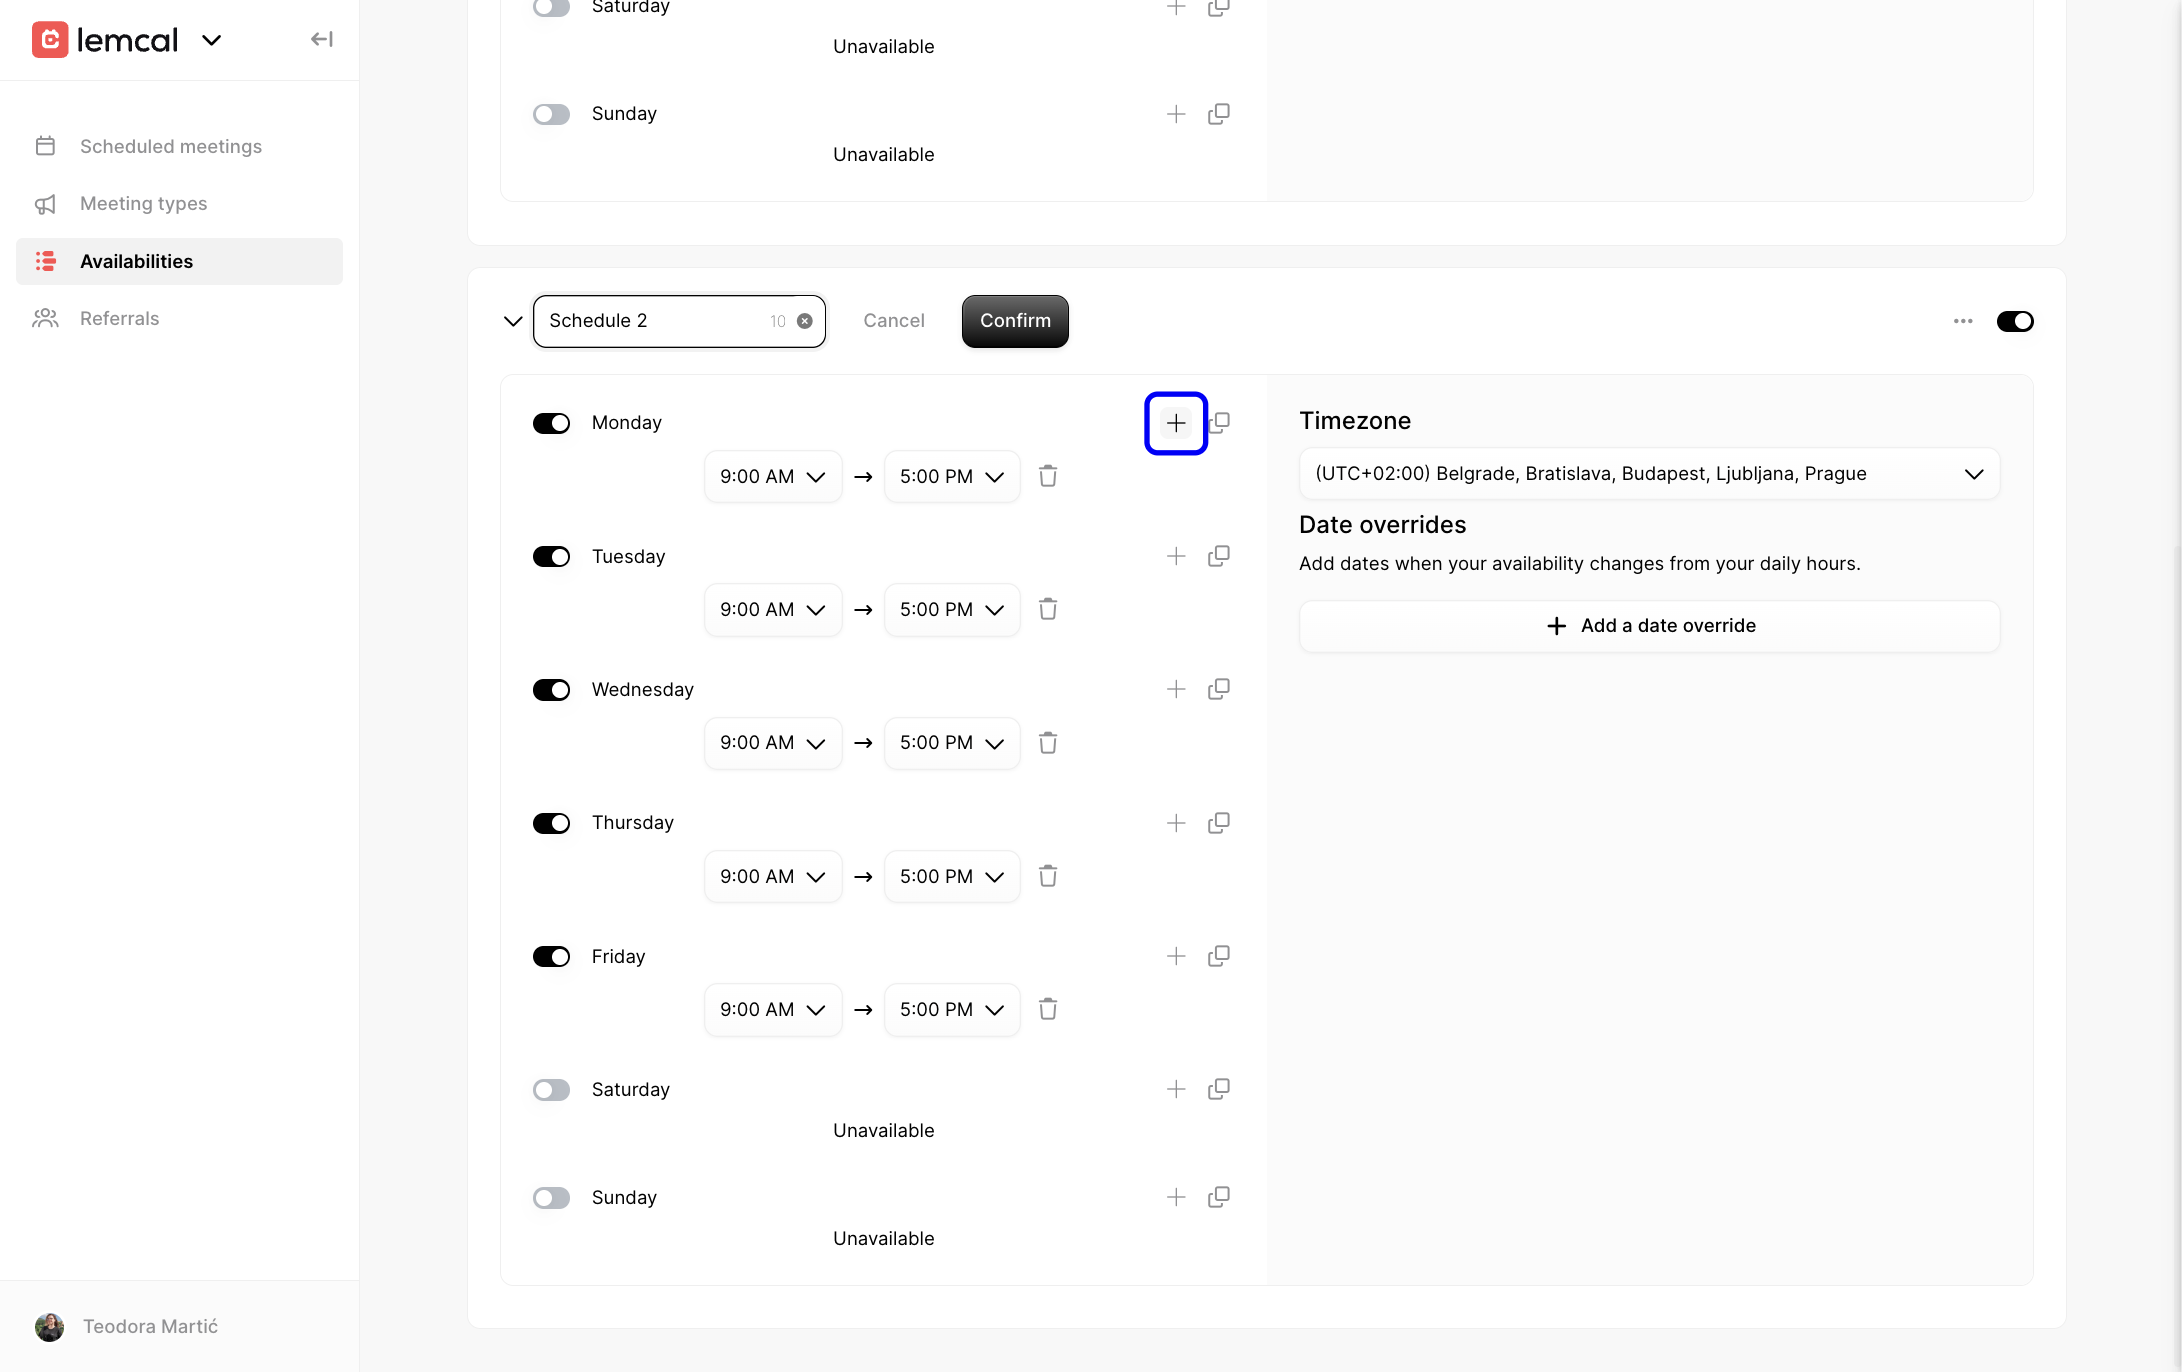
Step 4: Add multiple time slots to the same day
If you’re available in separate blocks, click the + icon next to that day to add another time slot. This is useful if, for example, you take a lunch break or only want meetings in the morning and late afternoon.
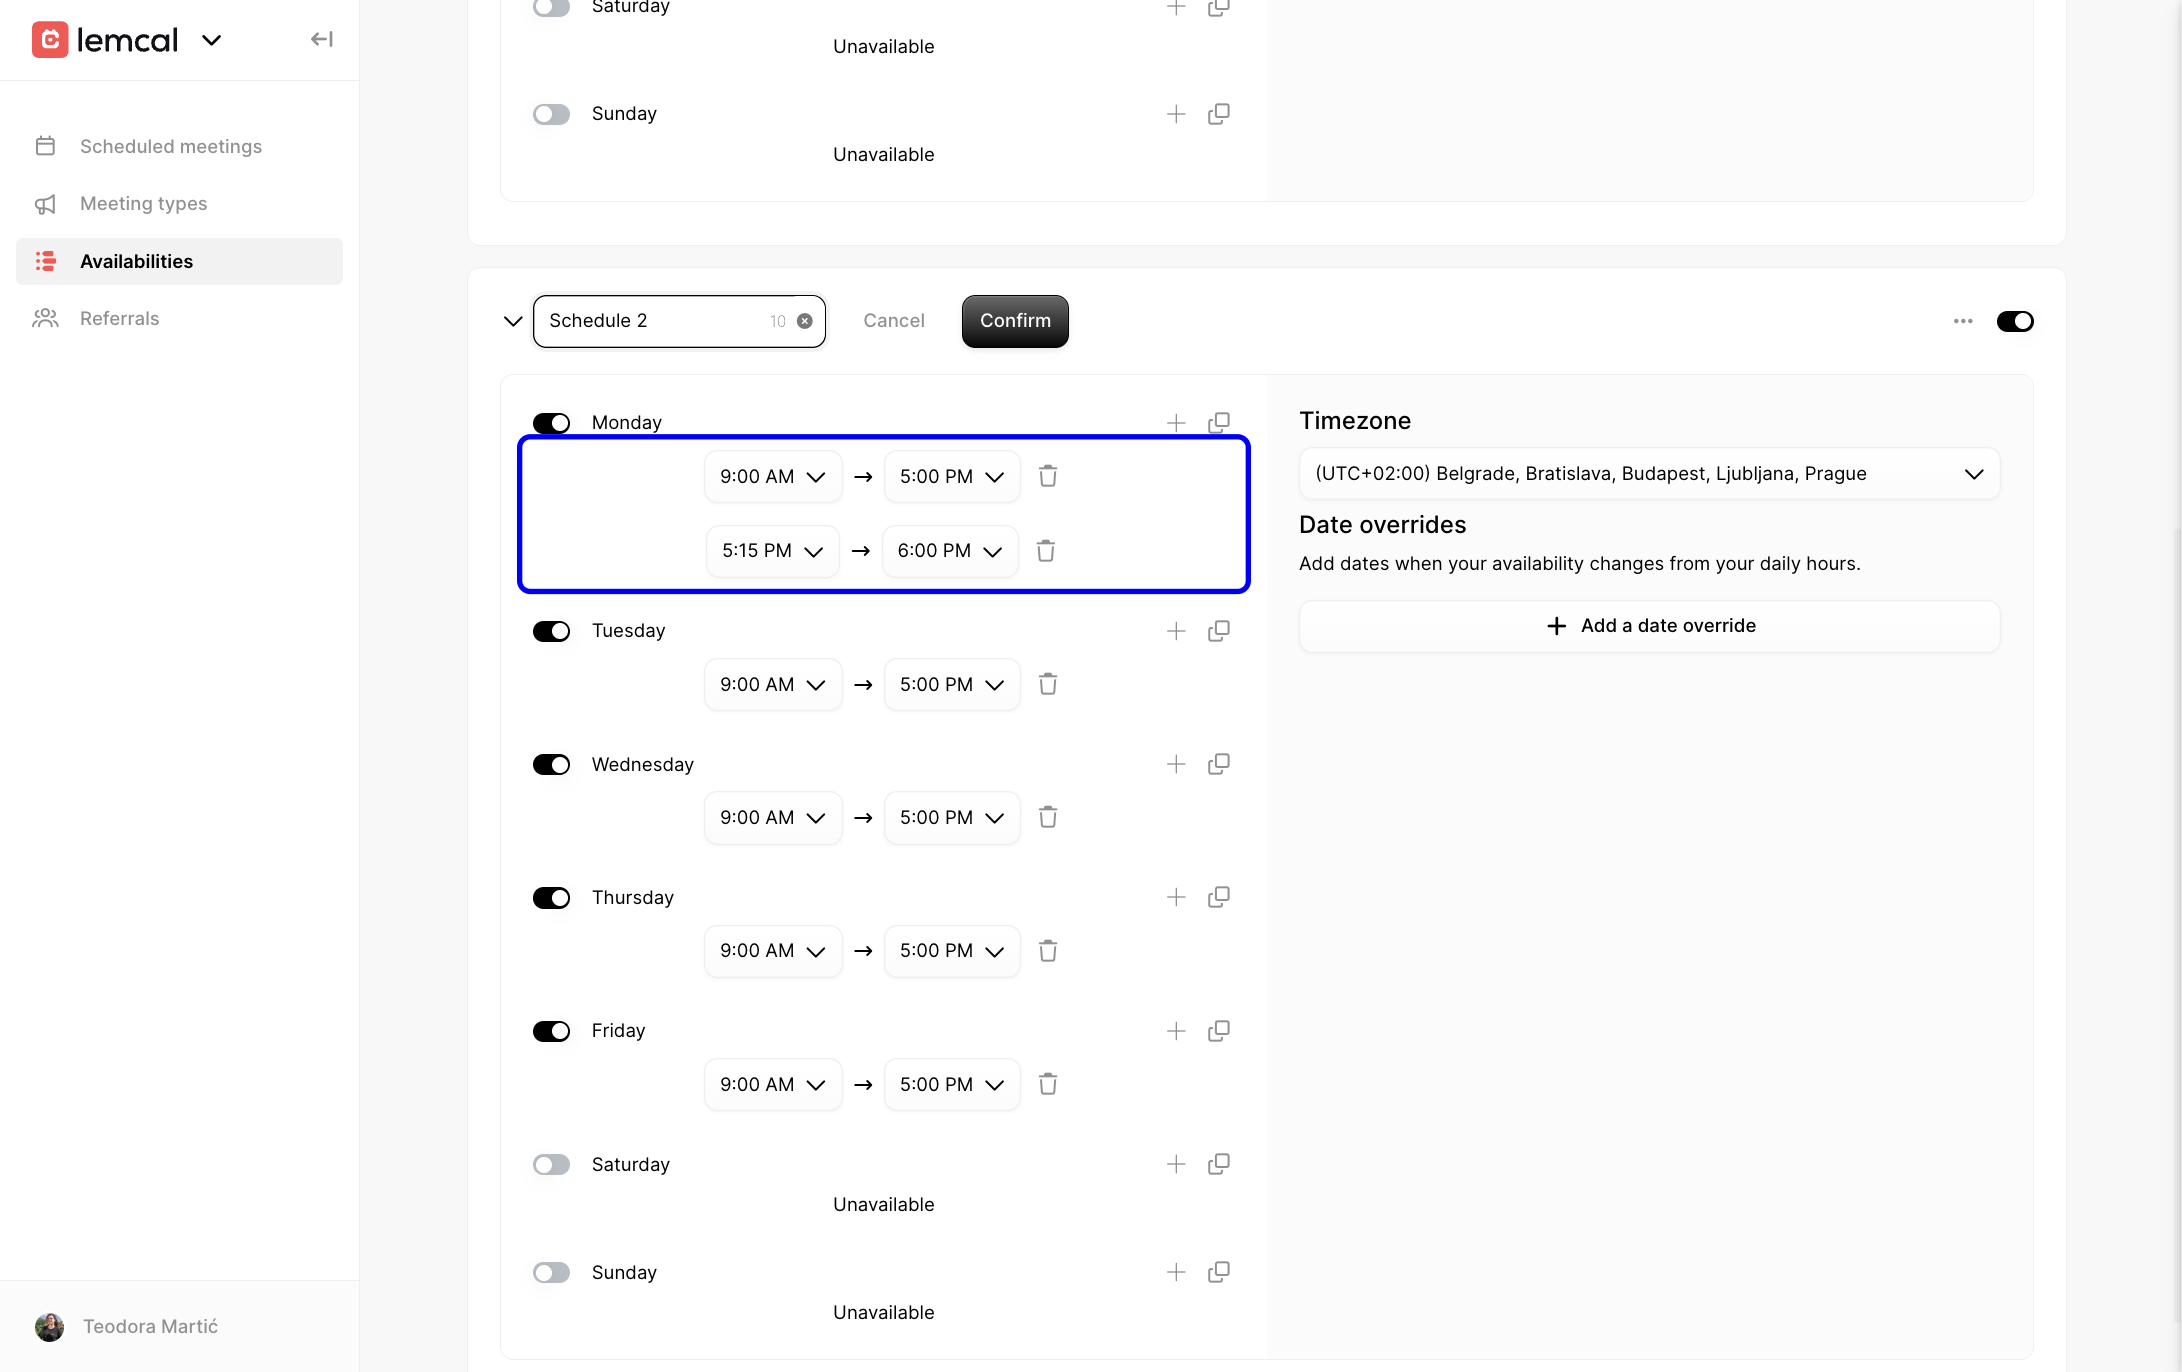
Step 5: Review multiple time slots
After adding another block, you’ll see both time ranges listed under the same day. You can adjust each block independently to match your exact working hours.
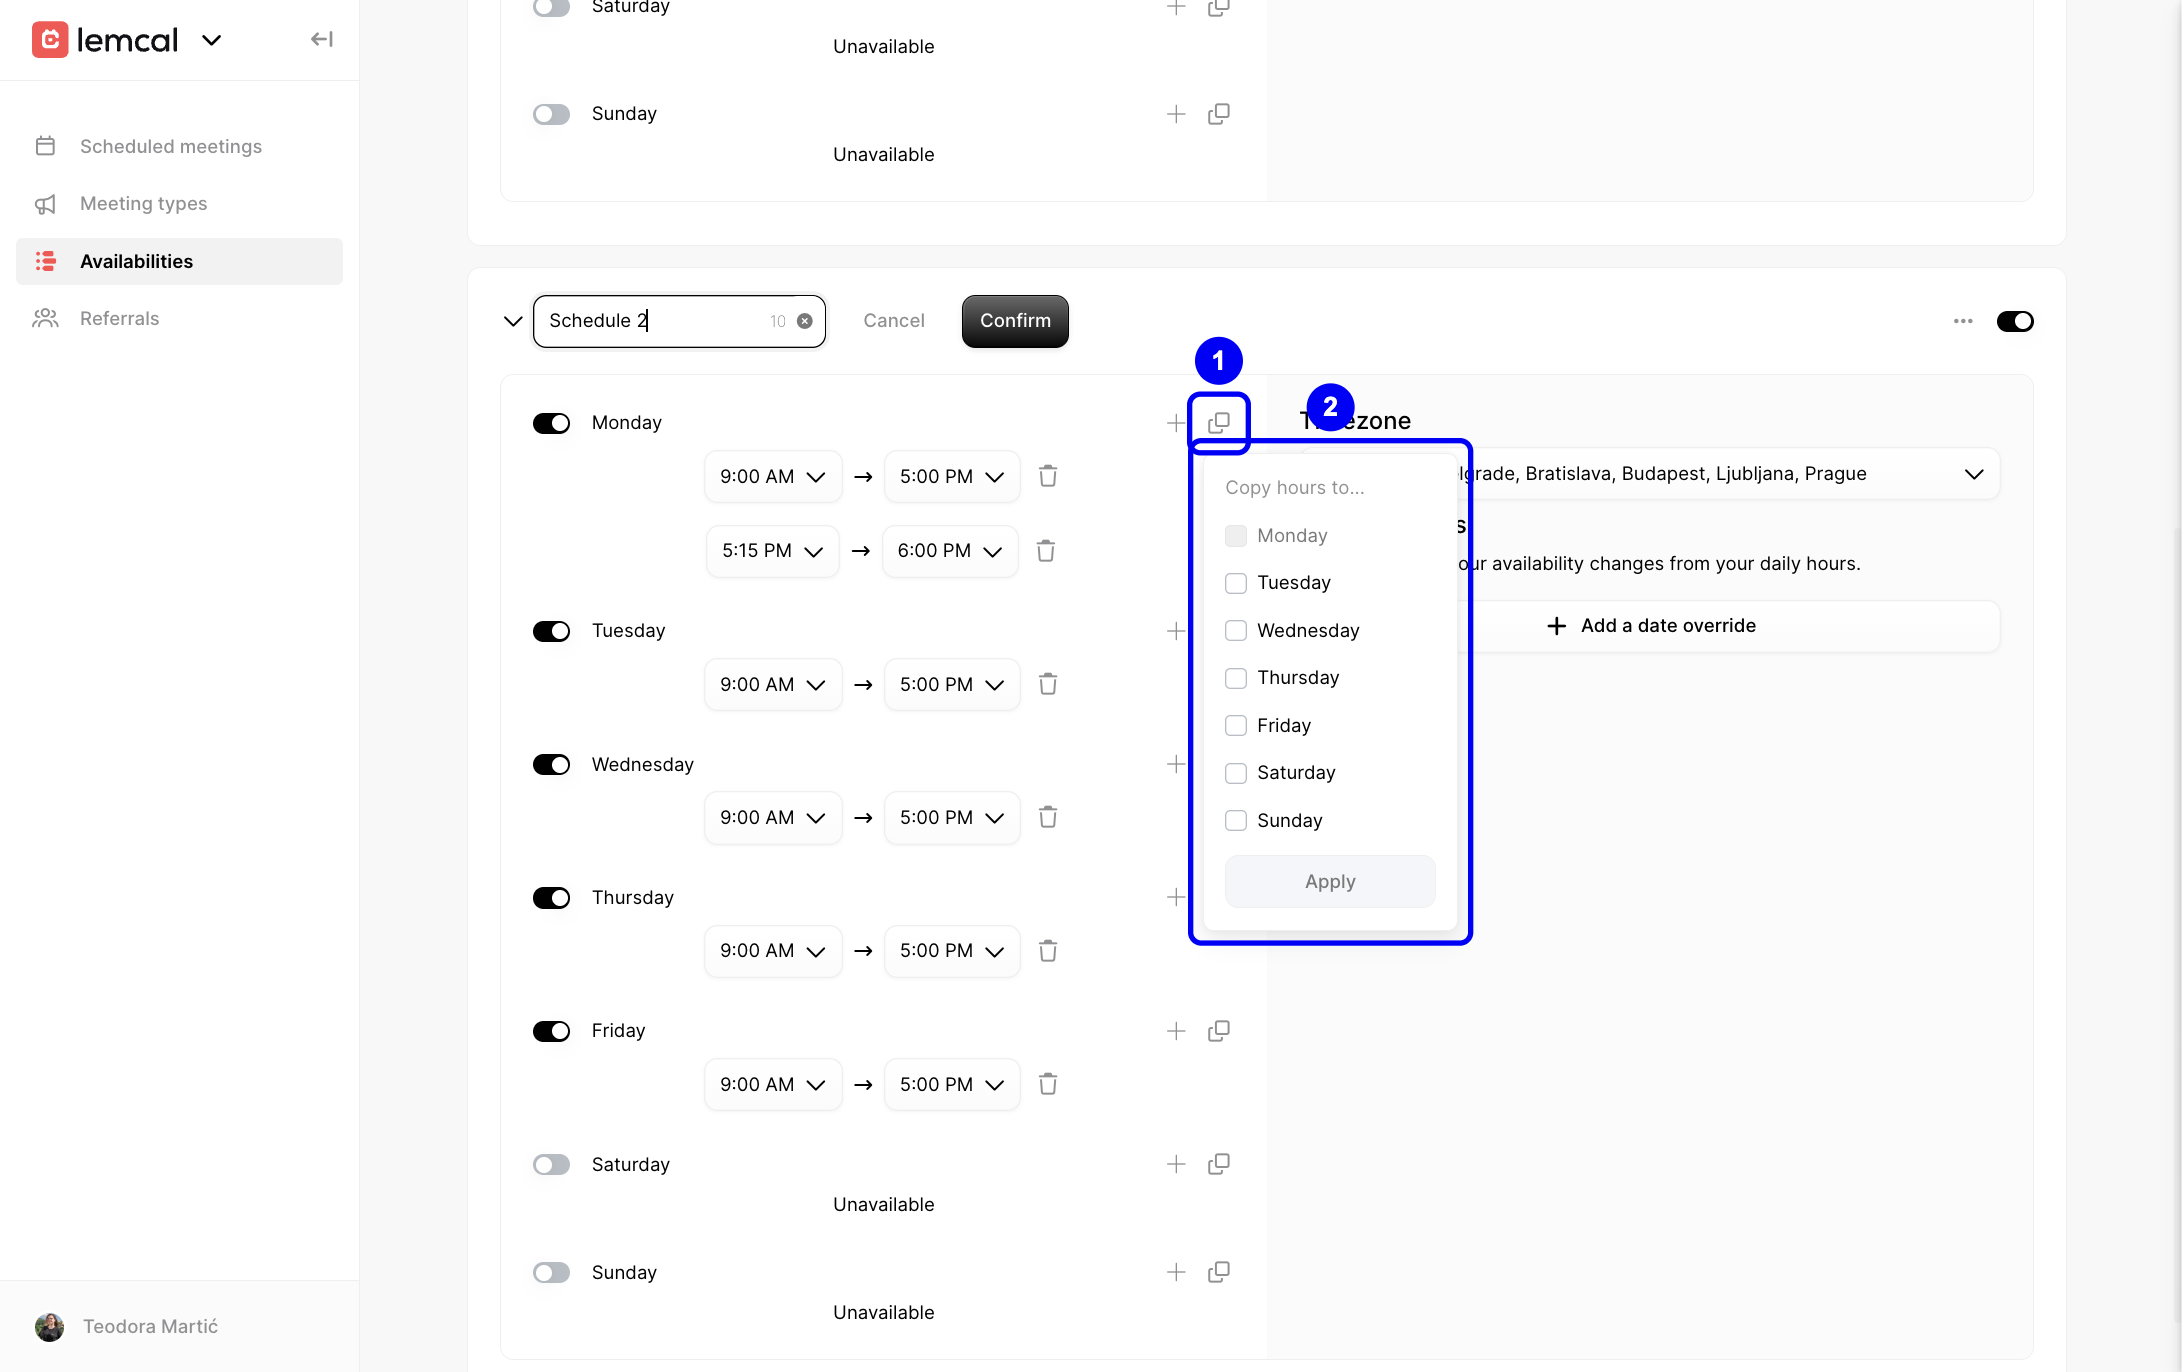
Step 6: Copy hours to other days
To reuse the same hours elsewhere, click the copy hours icon for that day, select the days you want to apply those hours to, and then apply the change. This saves time and keeps your weekly schedule consistent.
Step 7: Turn a day off when you’re unavailable
If you don’t want meetings on a certain day, switch that day off. That day will show as unavailable and won’t accept bookings in that schedule.

Step 8: Choose the schedule timezone
Use the Timezone dropdown to select the timezone that should apply to this schedule. This is important when your working hours need to stay tied to a specific region instead of changing based on where bookings are viewed.

Step 9: Start a date override
Click Add a date override when your availability needs to change for a specific date. Overrides let you handle exceptions without changing your standard weekly schedule.
Step 10: Review the override once it’s added
After you create an override, it appears in the Date overrides section with the date, hours, and status. You can use this list to quickly confirm that your exception is set correctly.

Step 11: Pick the date you want to override
In the override modal, select the date you want to customize from the calendar. This tells lemcal which day should use special hours instead of your normal weekly pattern.

Step 12: Choose whether the override is Available or Not available
Use the toggle at the top of the modal to decide whether you want to add special Available hours or block time as Not available. This gives you flexibility for holidays, travel days, special office hours, or one-off openings.

Step 13: Set the start time for that date
Choose the first time value to define when your availability or unavailability begins on that specific date.
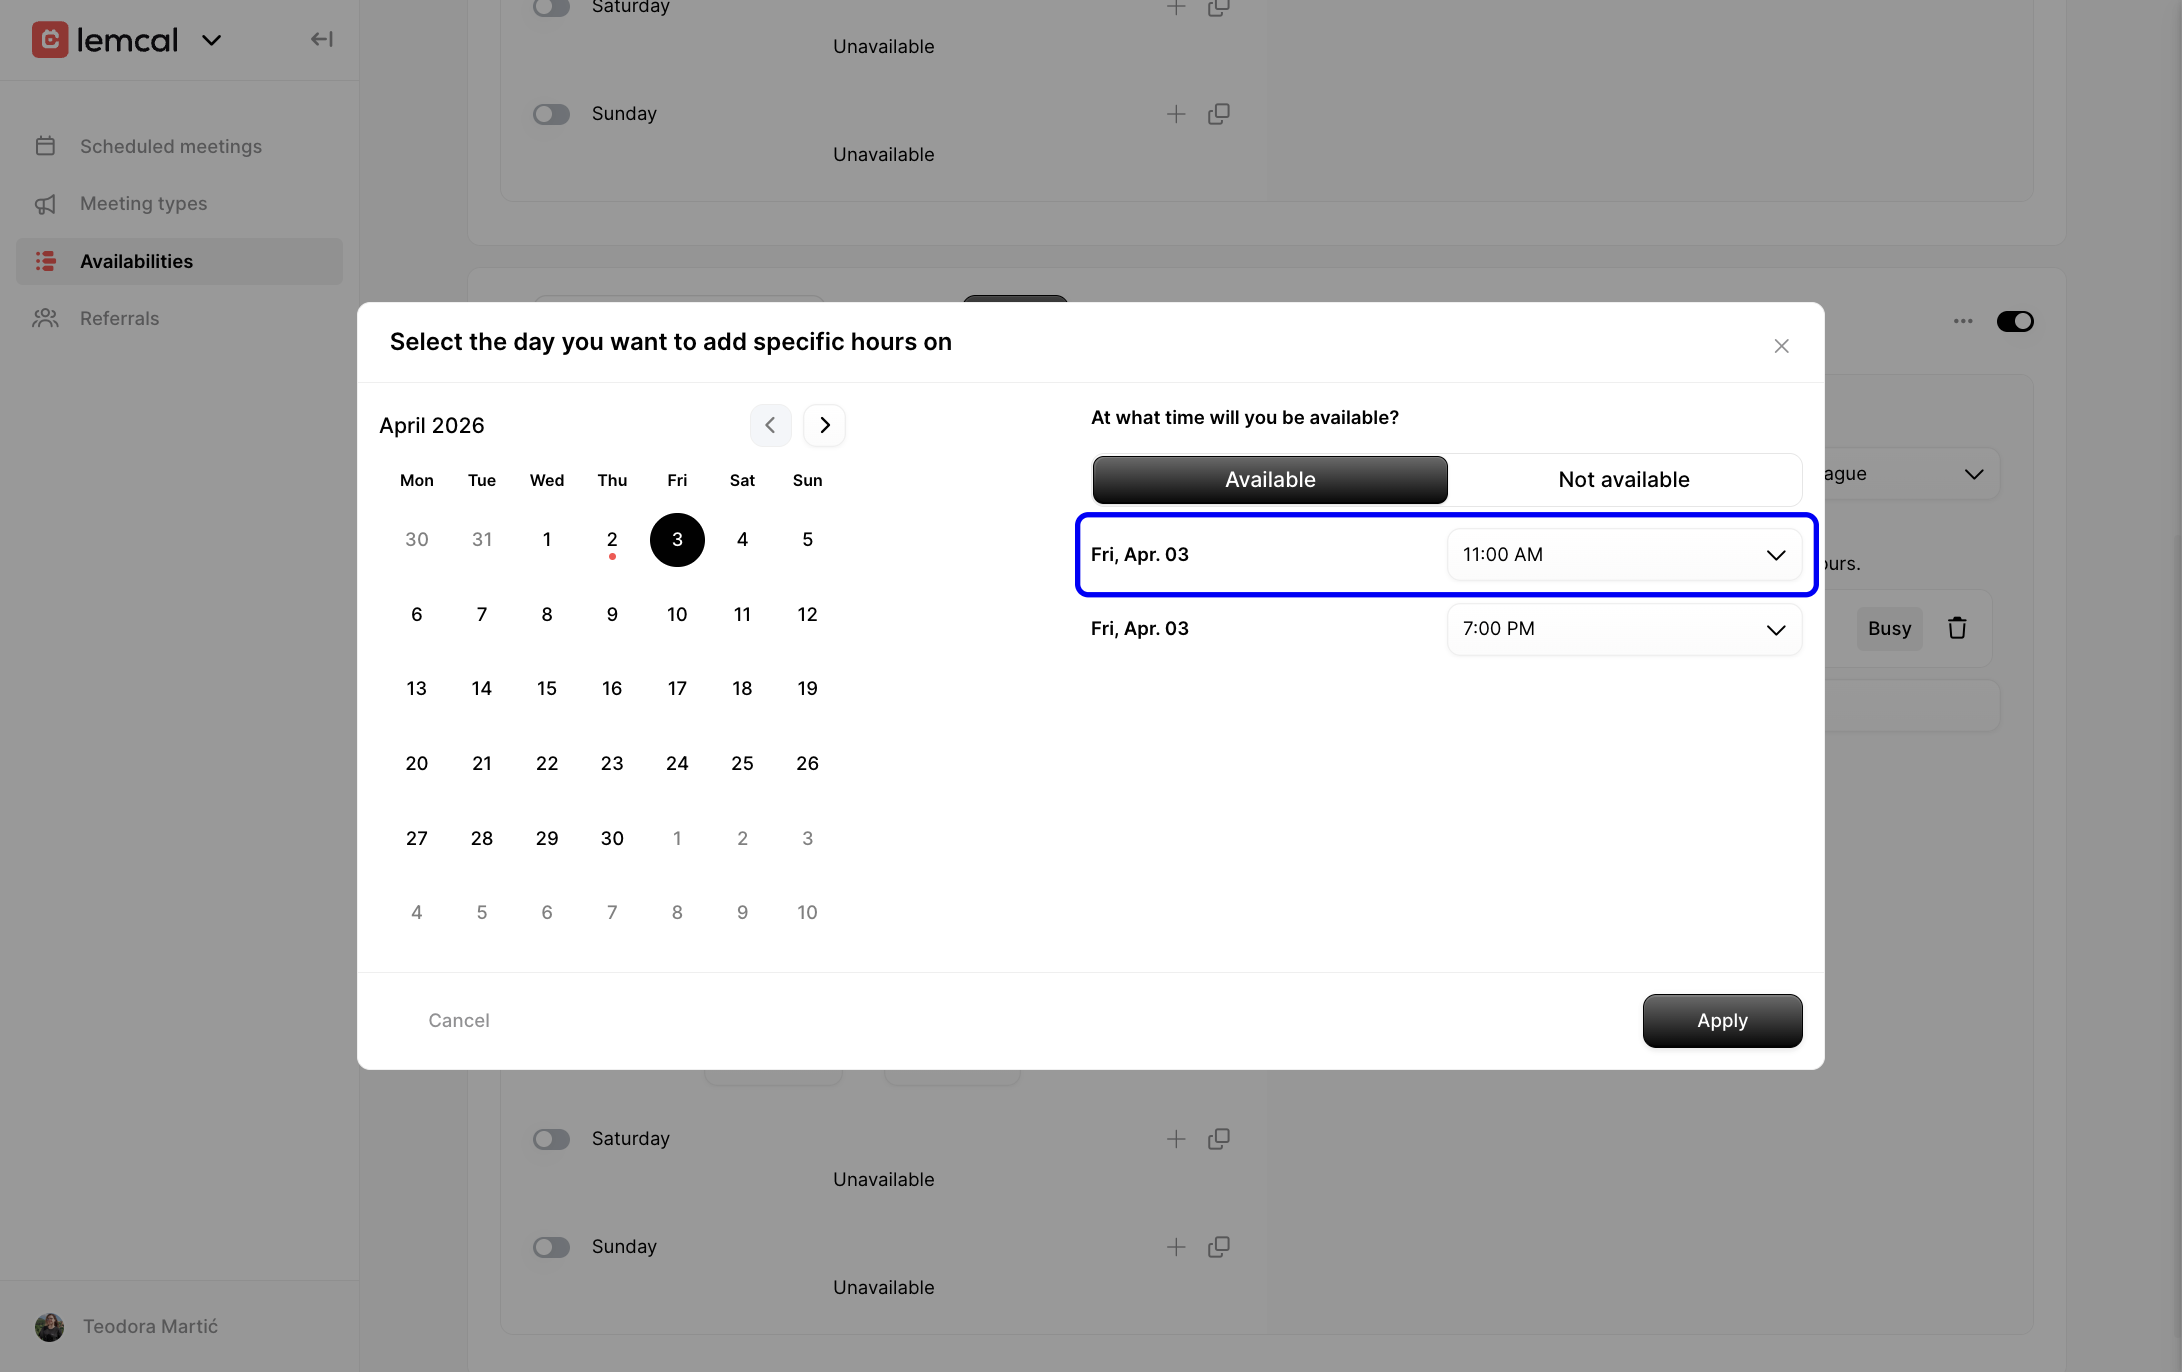
Step 14: Set the end time for that date
Choose the second time value to define when that override ends. Together, the start and end time create the exact booking window or blocked period for that day.

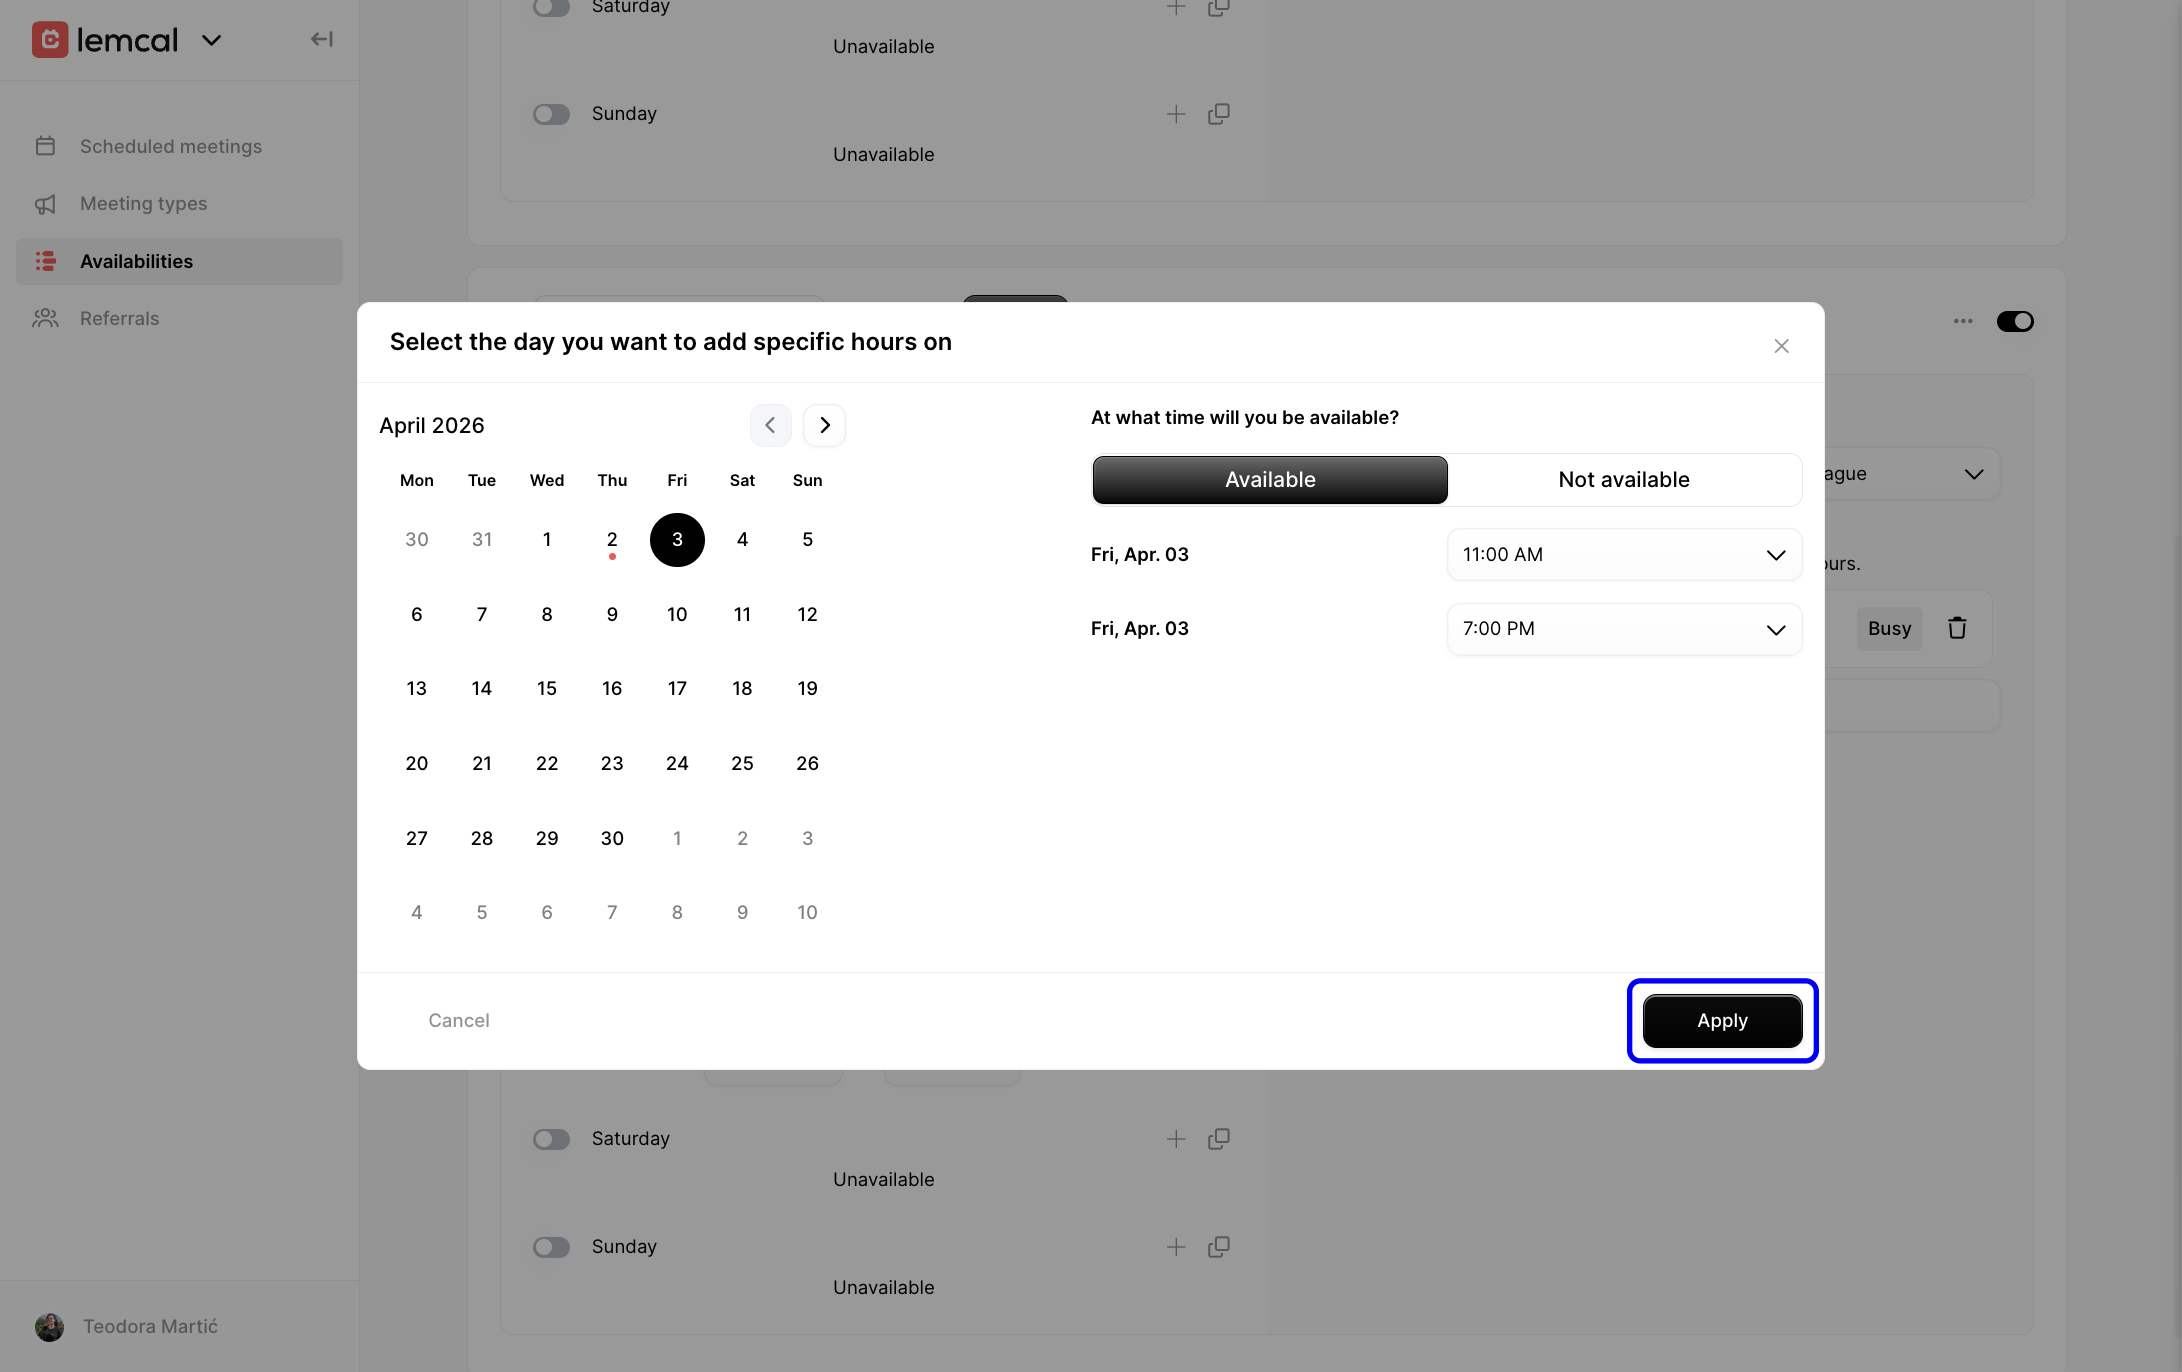
Step 15: Apply the override
Click Apply to save the date-specific rule to your schedule. Once saved, it will appear in the Date overrides section of the schedule.
Here’s one simple way to use this setup in practice:
Create a schedule for your standard workweek with Monday to Friday enabled, add a second time slot on Monday for late-day meetings, copy those hours to similar days, set the correct timezone for your region, and then add a date override for a day when your schedule changes. This helps you keep one consistent schedule while still handling exceptions cleanly.
Issue: A day is showing as unavailable
Root cause: The day toggle is turned off.
Fix: Turn the day back on, then set at least one valid time slot for that day.
Issue: You need two meeting windows in one day
Root cause: Only one time slot has been added.
Fix: Click the + icon next to that day and create another time range.
Issue: Your hours are different across days when they should match
Root cause: Hours were entered manually for each day.
Fix: Use the copy hours option to apply the same availability to the other days you want.
Issue: Bookings appear at the wrong time
Root cause: The schedule timezone is not set correctly.
Fix: Open the Timezone dropdown and select the timezone that should control this schedule.
Issue: You only want to change one date, not the whole week
Root cause: The weekly schedule was edited instead of using an override.
Fix: Revert the weekly change if needed, then use Add a date override to create a one-day exception.
Once your schedule is ready, you can use it wherever you need more control over your booking availability. If your working hours change often, date overrides are the best way to keep your weekly schedule clean while still managing one-off exceptions.


